

Lorem ipsum dolor sit amet, dolor siterim consectetur adipiscing elit. Phasellus duio faucibus est sed facilisis viverra. Umero praesent nec accumsan nibh, eu grav da metus.
This is a demo store for testing purposes — no orders shall be fulfilled. Dismiss
 Jamaica
Jamaica
Jamaica
2 min read
Delivery zones and shipping rates control where you deliver and how much you charge.
Setting these correctly helps you avoid losses, failed deliveries, and unhappy customers.
This guide explains how to set delivery zones and rates properly using the Dokan Multivendor seller system.

A delivery zone is a geographic area where a specific shipping rate applies.
Examples:
📌 Each zone can have different delivery fees.
Delivery zones help you:
🚚 One flat rate for everything usually causes problems.
Depending on your setup, you may:
📍 Only add zones you can realistically deliver to.


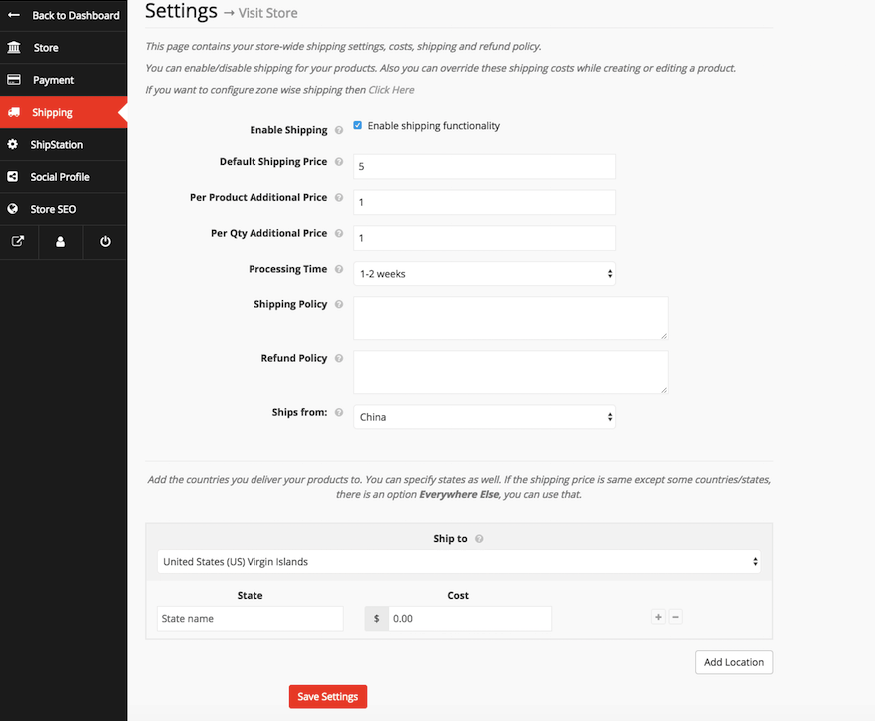
For each zone, set:
💰 Always include fuel and handling costs.
Your rates may be:
📌 Keep pricing simple when starting out.
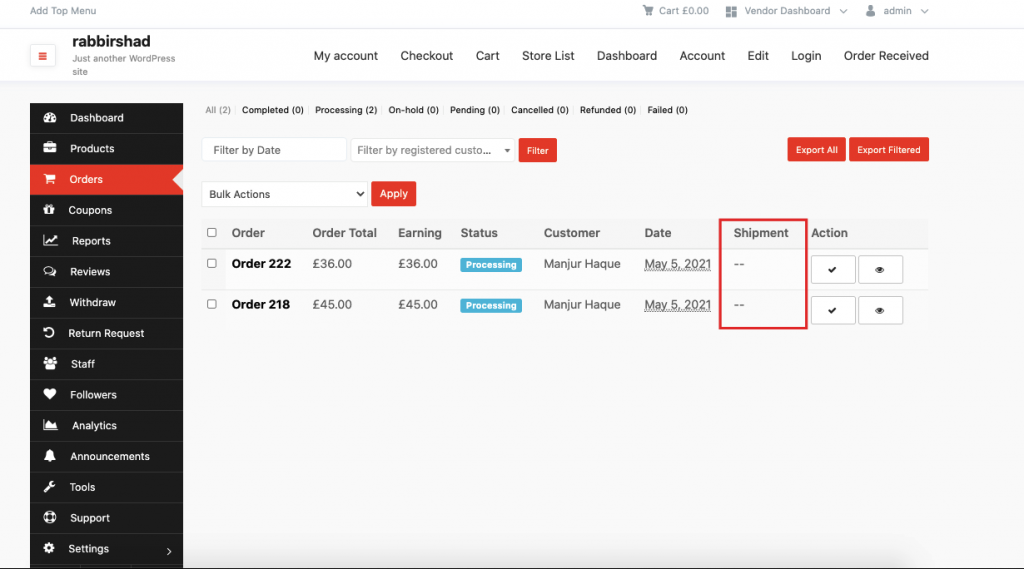
After setting zones and rates:
🧪 Testing prevents surprises for customers.

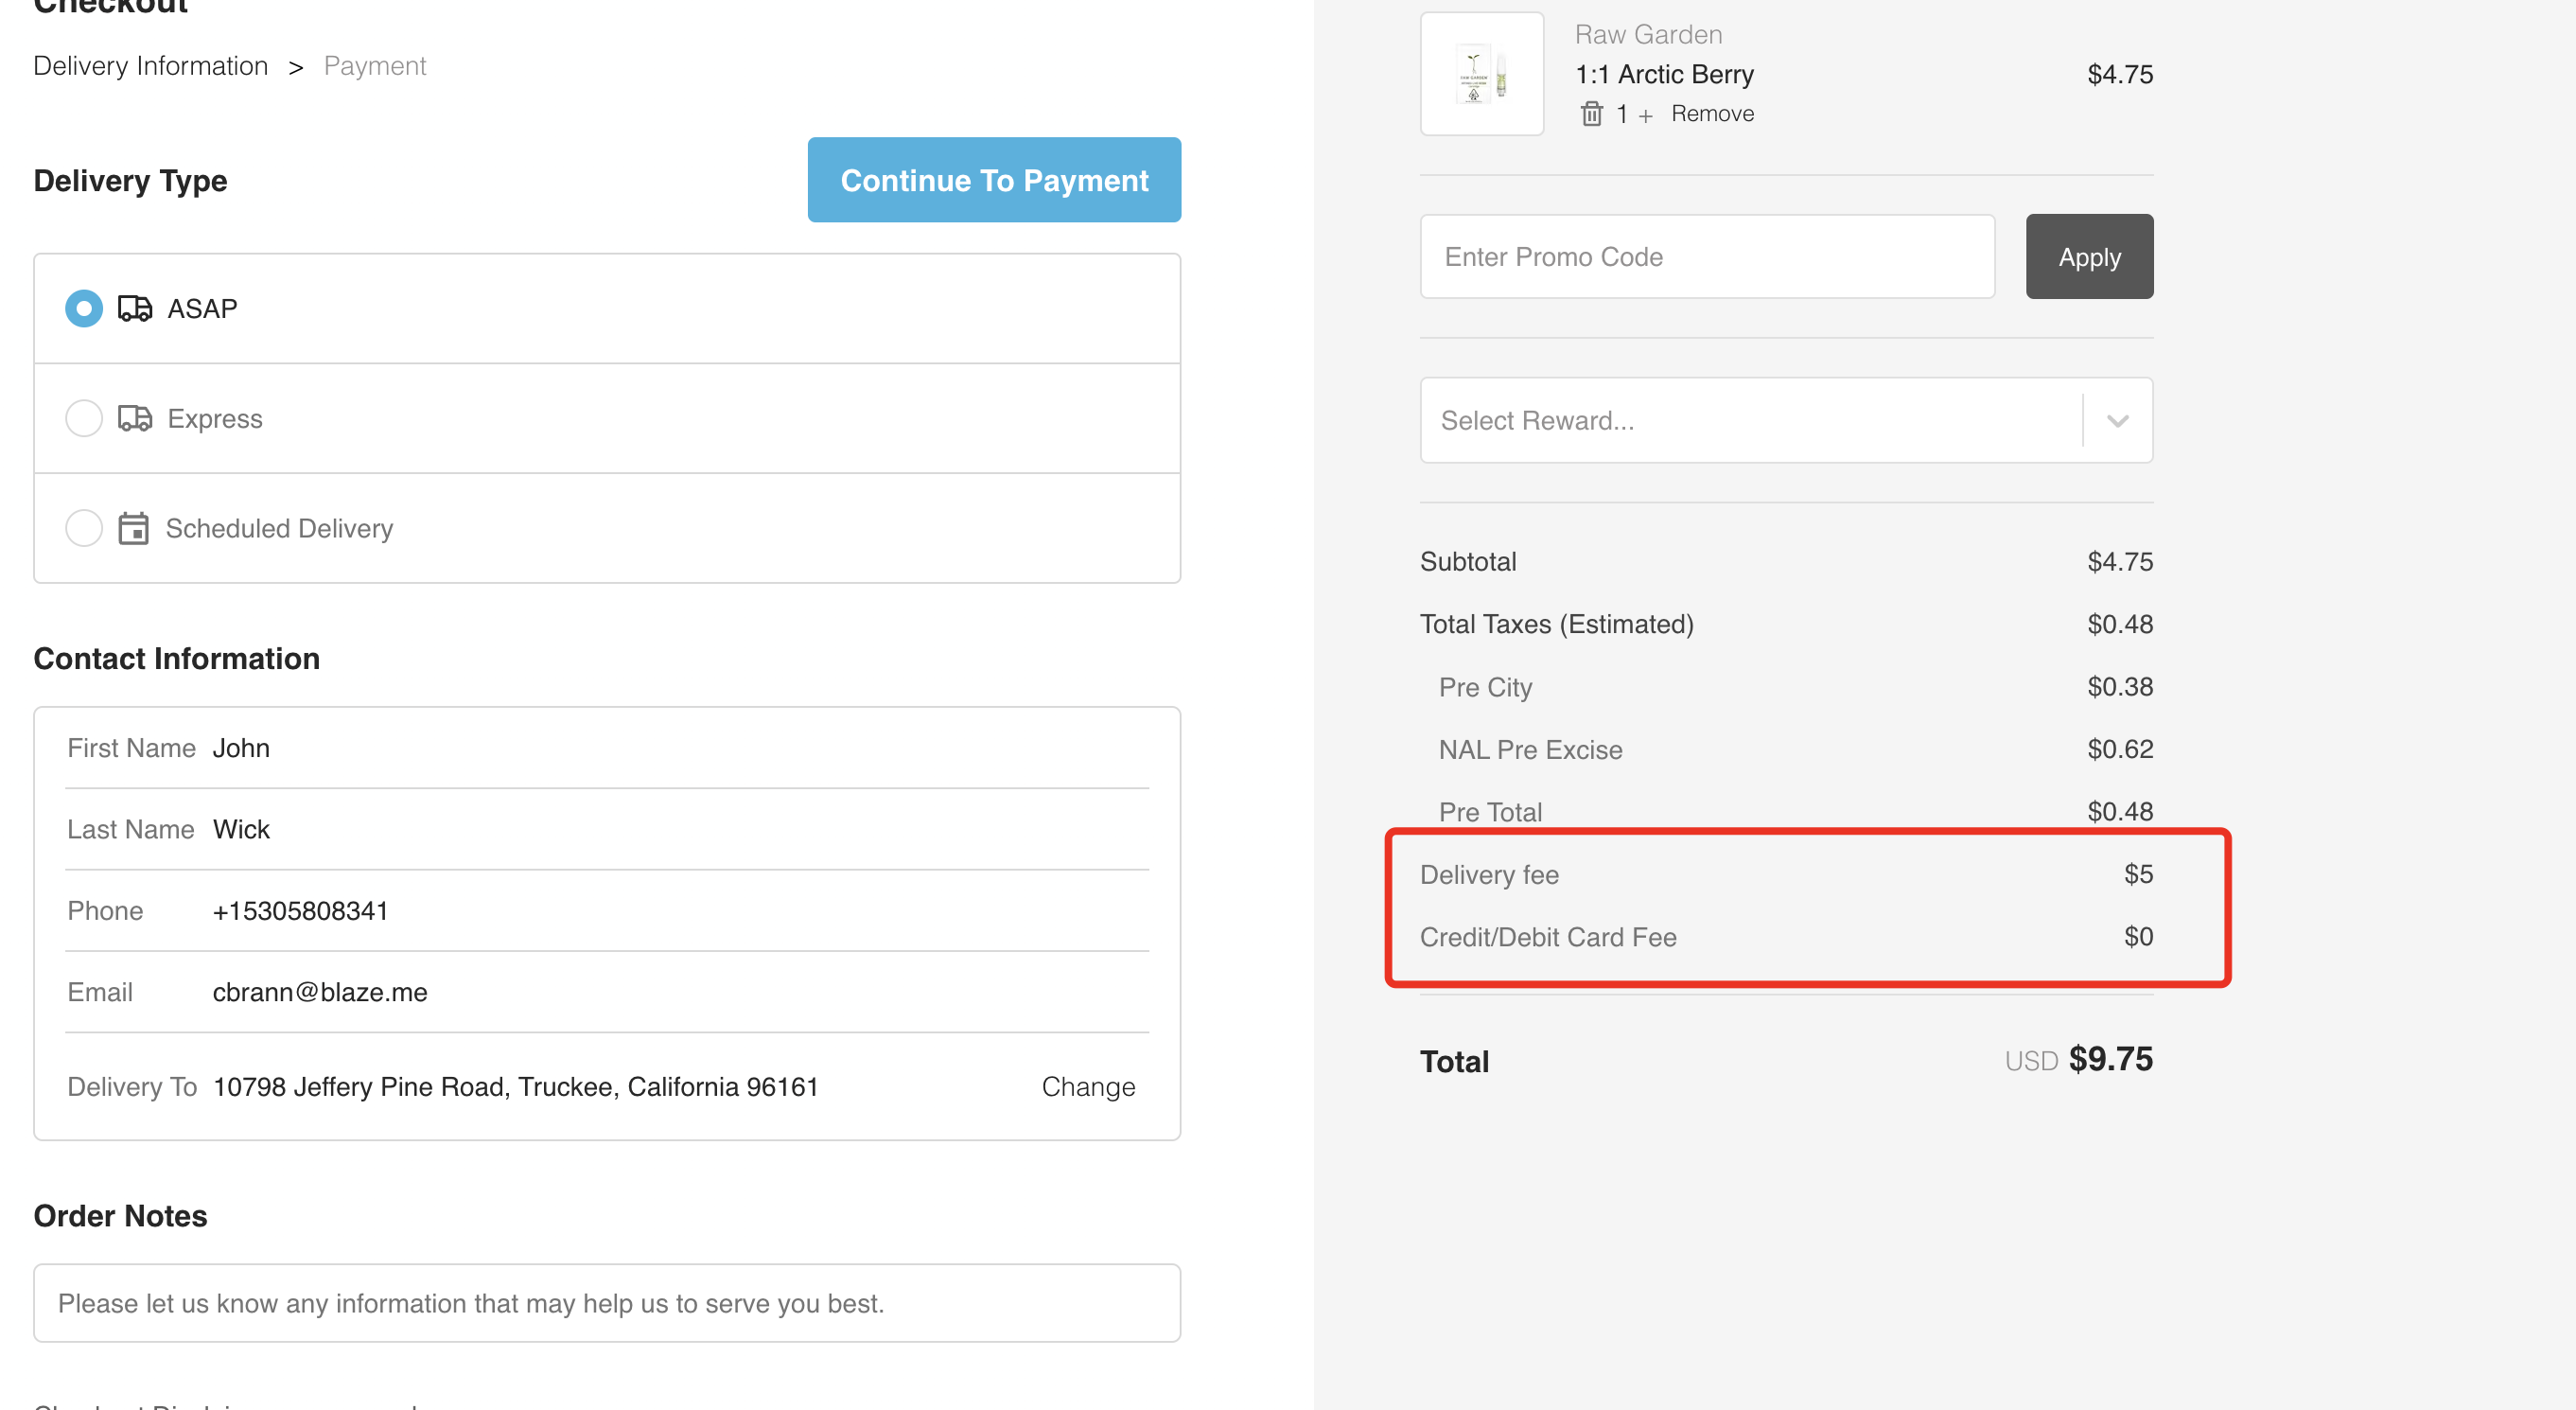
Customers will see:
🛒 Clear pricing increases trust and conversions.
❌ Undercharging for far distances
❌ Forgetting to update rates when fuel costs change
❌ Offering islandwide delivery without courier support
❌ Using vague delivery zones
⚠️ Delivery mistakes cost money.
✔ Start slightly higher, then adjust
✔ Separate Kingston vs non-Kingston
✔ Offer pickup to reduce delivery costs
✔ Communicate delivery times clearly
Update if:
Your delivery zones and shipping rates protect your profits. Set them realistically, review them often, and don’t be afraid to adjust as your business grows 📦🚚


This chat uses automated responses for general guidance. For binding terms, please refer to our official policies.
Start A Conversation
Click here to chat with me!
Search our website now
Latest Products
Latest Posts
Tips how to choise a perfect watch foractive guys
Lorem ipsum dolor sit amet, dolor siterim consectetur adipiscing elit. Phasellus duio faucibus est sed facilisis viverra. Umero praesent nec accumsan nibh, eu grav da metus.
Harman Kadon Onyx Studio Mini, Reviews & Experiences
Lorem ipsum dolor sit amet, dolor siterim consectetur adipiscing elit. Phasellus duio faucibus est sed facilisis viverra. Umero praesent nec accumsan nibh, eu grav da metus.
Lorem ipsum dolor sit amet, dolor siterim consectetur adipiscing elit. Phasellus duio faucibus est sed facilisis viverra. Umero praesent nec accumsan nibh, eu grav da metus.
Lorem ipsum dolor sit amet, dolor siterim consectetur adipiscing elit. Phasellus duio faucibus est sed facilisis viverra. Umero praesent nec accumsan nibh, eu grav da metus.
Lorem ipsum dolor sit amet, dolor siterim consectetur adipiscing elit. Phasellus duio faucibus est sed facilisis viverra. Umero praesent nec accumsan nibh, eu grav da metus.

Subscribe to the Martfury mailing list to receive updates on new arrivals, special offers and our promotions.