

Lorem ipsum dolor sit amet, dolor siterim consectetur adipiscing elit. Phasellus duio faucibus est sed facilisis viverra. Umero praesent nec accumsan nibh, eu grav da metus.
This is a demo store for testing purposes — no orders shall be fulfilled. Dismiss
 Jamaica
Jamaica
Jamaica
2 min read
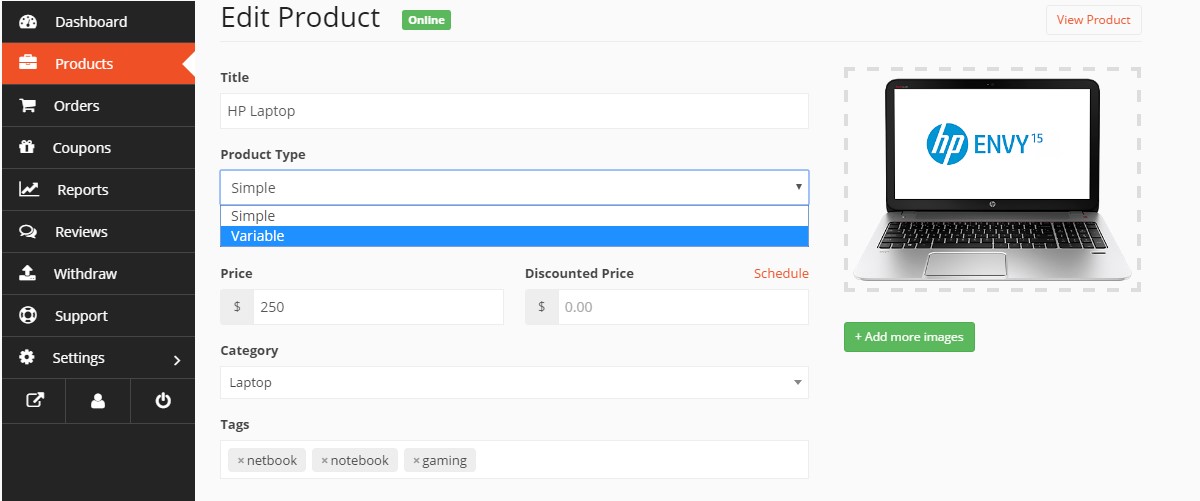
Product variations let customers choose options like size, color, material, or style from one product listing.
Using variations correctly keeps your store clean, professional, and easy to shop.
This guide shows you step by step how to add and manage variations using Dokan Multivendor.

Variations are different versions of the same product, such as:
📌 If it’s the same product with options, use variations — not separate products.
Use variations when:
✔ Same product, different options
✔ Customers must choose before checkout
✔ Price or stock changes by option
❌ Don’t use variations for completely different products.

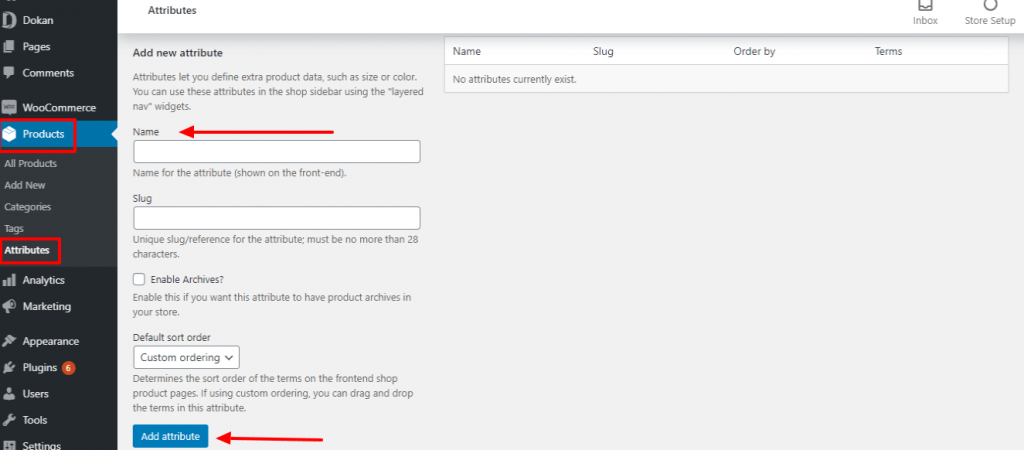
Attributes define your variation options.
|
S | M | L📌 This step is critical.
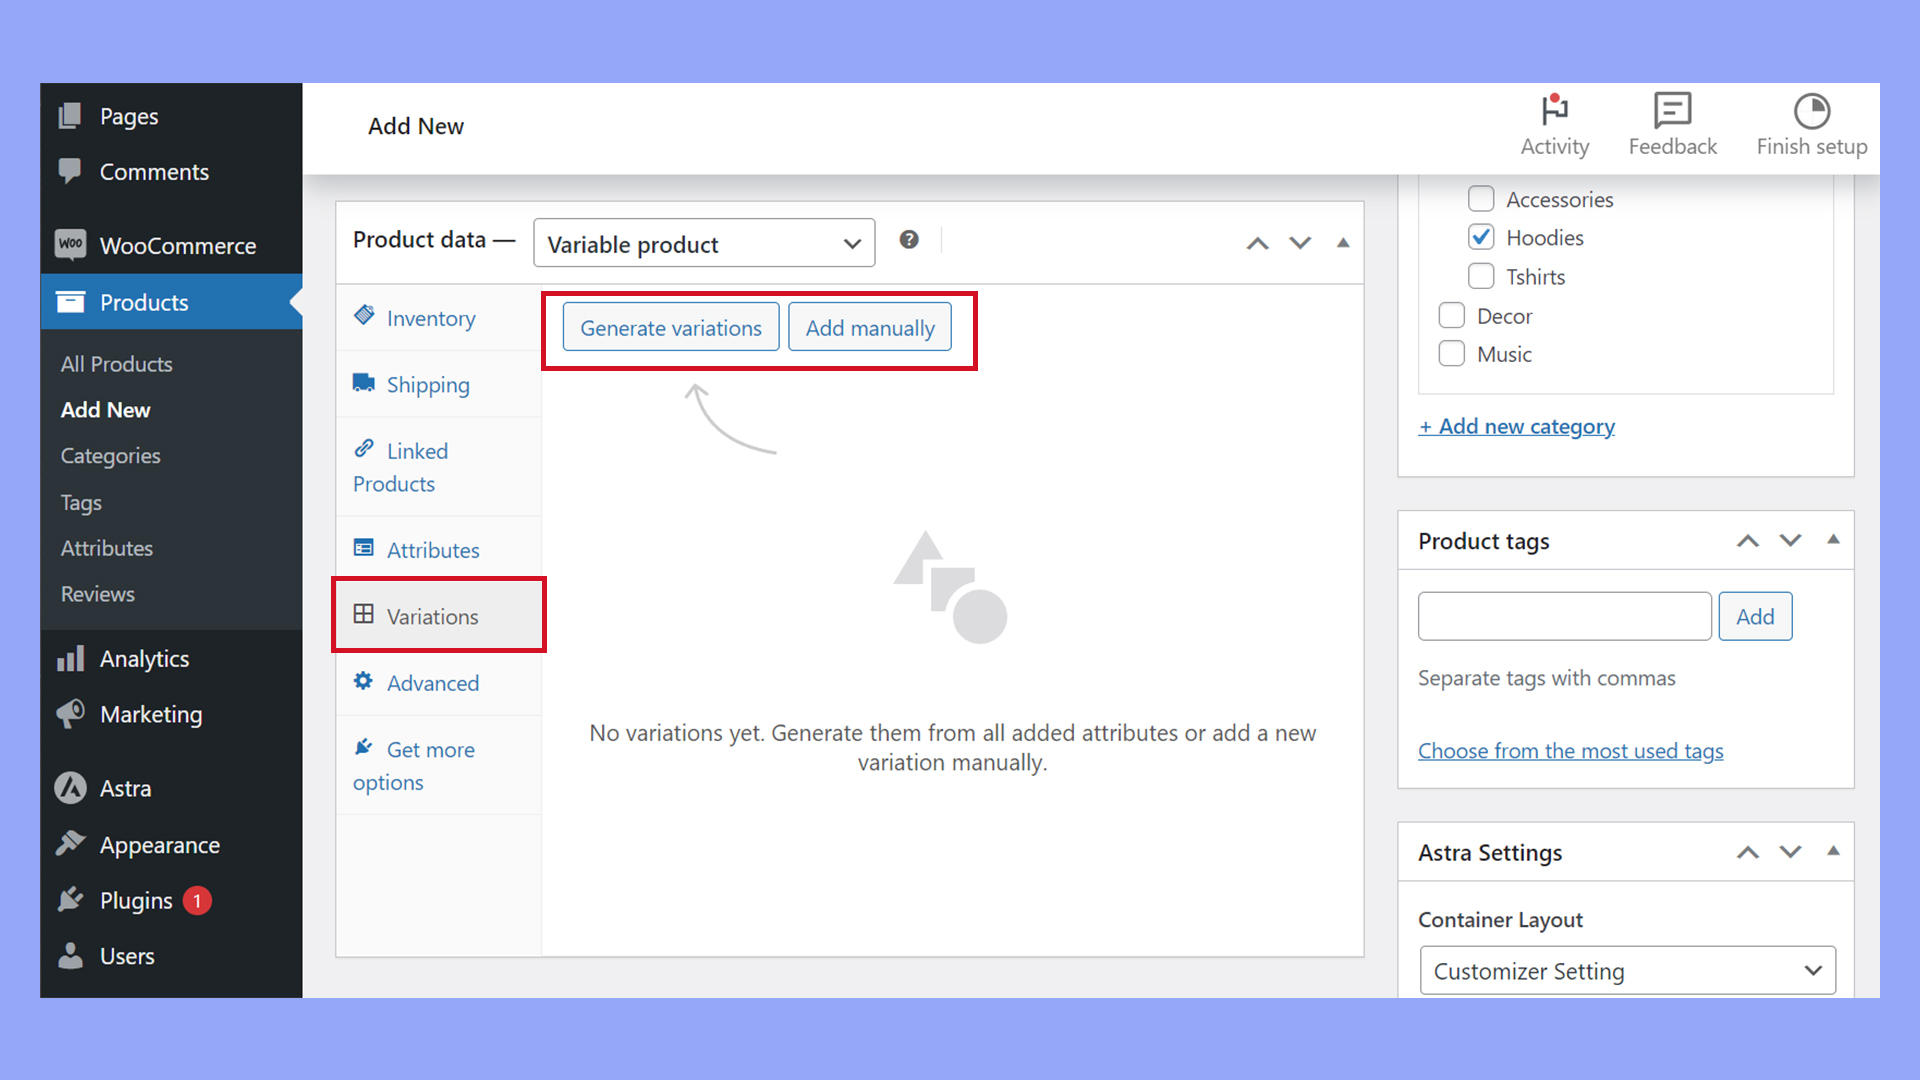
🧩 The system auto-creates each combination.

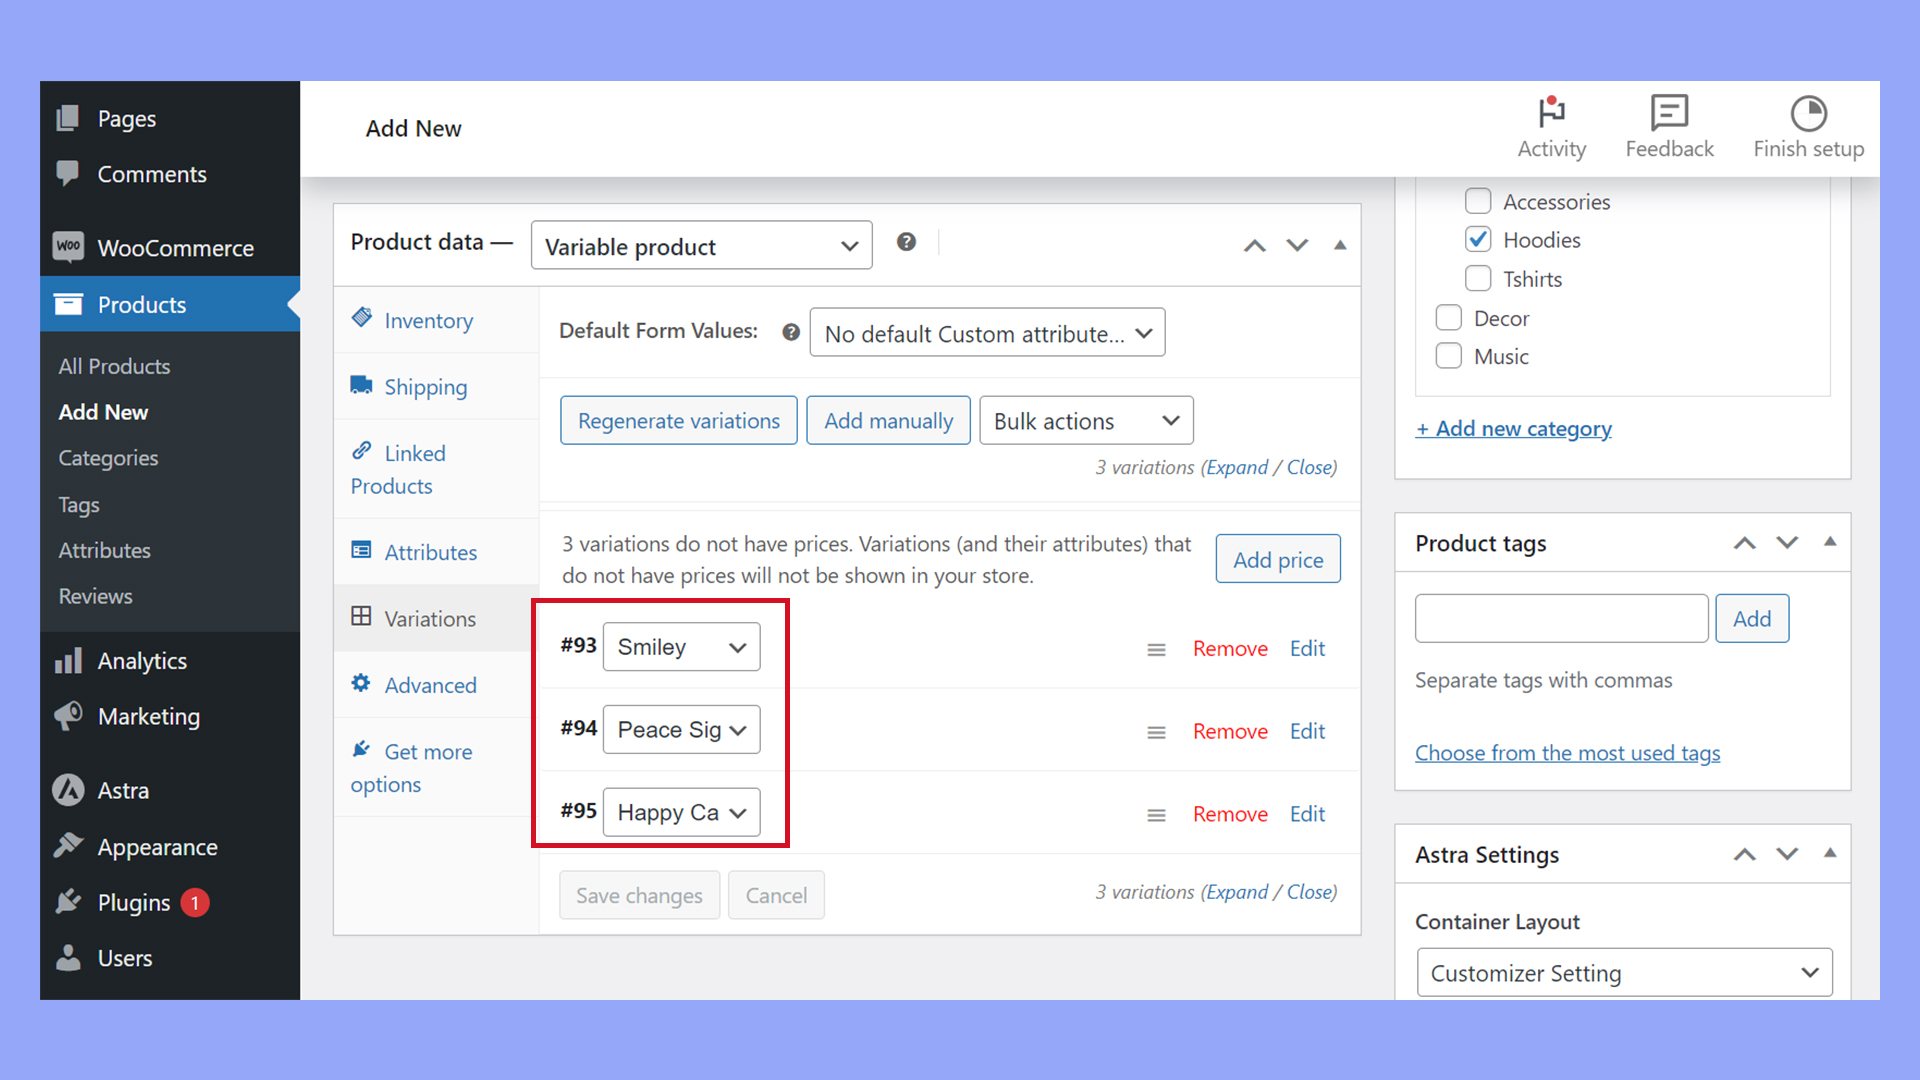
For each variation:
📦 Each variation is treated like its own mini-product.
Once all variations are set:
✅ Customers can now select options before checkout.
Customers will:
🛒 This improves shopping experience.
❌ Forgetting to check “Used for variations”
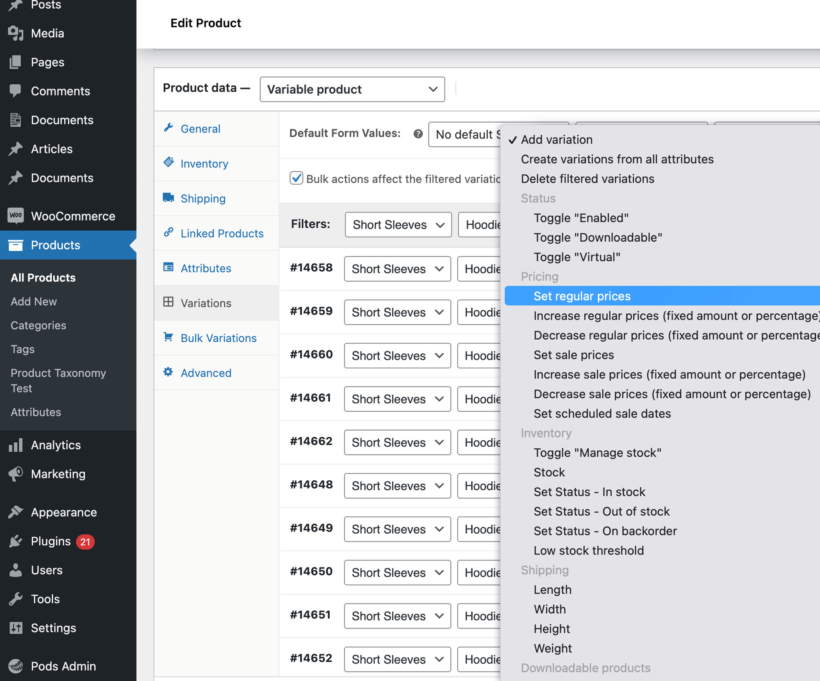
❌ Not setting stock per variation
❌ Leaving variations without prices
❌ Creating too many unnecessary combinations
⚠️ These cause checkout errors.
✔ Use only necessary attributes
✔ Keep option names simple
✔ Add variation images for colors
✔ Disable out-of-stock variations
Variations make your store look organized and professional.
Once you master them, managing products becomes much easier 🧩📦


This chat uses automated responses for general guidance. For binding terms, please refer to our official policies.
Start A Conversation
Click here to chat with me!
Search our website now
Latest Products
Latest Posts
Tips how to choise a perfect watch foractive guys
Lorem ipsum dolor sit amet, dolor siterim consectetur adipiscing elit. Phasellus duio faucibus est sed facilisis viverra. Umero praesent nec accumsan nibh, eu grav da metus.
Harman Kadon Onyx Studio Mini, Reviews & Experiences
Lorem ipsum dolor sit amet, dolor siterim consectetur adipiscing elit. Phasellus duio faucibus est sed facilisis viverra. Umero praesent nec accumsan nibh, eu grav da metus.
Lorem ipsum dolor sit amet, dolor siterim consectetur adipiscing elit. Phasellus duio faucibus est sed facilisis viverra. Umero praesent nec accumsan nibh, eu grav da metus.
Lorem ipsum dolor sit amet, dolor siterim consectetur adipiscing elit. Phasellus duio faucibus est sed facilisis viverra. Umero praesent nec accumsan nibh, eu grav da metus.
Lorem ipsum dolor sit amet, dolor siterim consectetur adipiscing elit. Phasellus duio faucibus est sed facilisis viverra. Umero praesent nec accumsan nibh, eu grav da metus.

Subscribe to the Martfury mailing list to receive updates on new arrivals, special offers and our promotions.